

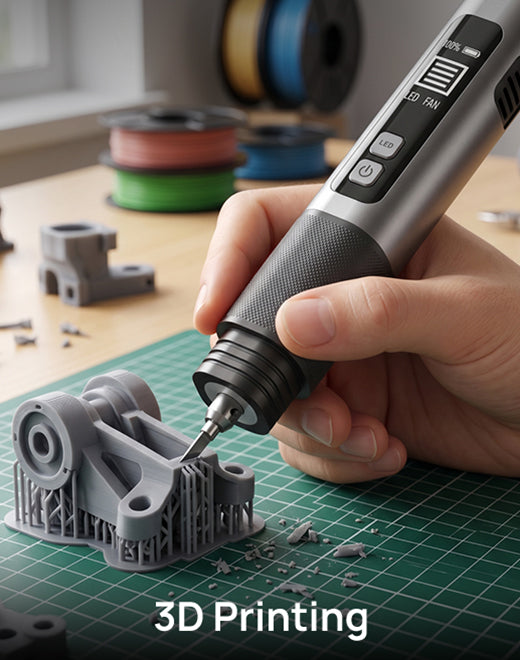
Short answer: Clean support removal is less about pulling harder and more about controlling where force enters the print. Start with accessible supports, stabilize thin features, cut connection points in small sections, and save sanding for the final surface cleanup. For dense supports near fragile details, a precision cutting tool can help reduce the bending and sudden release that often damages a finished model.
Kickstarter Progress: August 12, 2026
SonicMax Slice 10 launched yesterday and has already reached $48,764 pledged from 384 backers, with 28 days remaining at the time of this update. The first 200 Super Early Bird rewards are gone. The current limited Early Bird reward is $119, with estimated delivery listed as October 2026.
View SonicMax Slice 10 on Kickstarter
Campaign figures and reward availability can change after publication. Check Kickstarter for the latest information.
Why Complex Supports Are Different
A simple support tower under a flat surface may snap away cleanly. A detailed character, miniature, mechanical assembly, or resin display model is different. Supports may pass between fingers, armor panels, hair, wings, cables, or other narrow features. In those areas, the support can be stronger than the detail you are trying to protect.
The problem is not only the support itself. It is the direction and amount of force used during removal. Twisting a large support tree can transfer leverage into a thin wrist or decorative edge. Pulling several connected branches at once can create a sudden release that leaves a crater, white stress mark, or broken feature.
A better workflow treats support removal as controlled disassembly rather than one large breaking action.
Step 1: Inspect Before Cutting
Before touching the print, rotate it under bright light and identify three areas:
- Safe starting points: large, exposed supports away from finished surfaces.
- High-risk details: thin walls, fingers, antennae, blades, hair, and unsupported overhangs.
- Hidden contact points: supports that disappear behind or underneath the model.
If possible, compare the print with the slicer preview. The preview can help you understand which branches connect to the model and which are only part of the support structure. This is especially useful when the support tree visually overlaps the model.
Step 2: Remove the Outer Structure First
Start with supports that are easy to reach and clearly separated from delicate geometry. Removing the outer structure creates space for the tool and improves visibility. Do not try to free the entire model in one movement.
Work from the outside toward the center. Cut or separate one branch, check how the remaining structure moves, and then continue. If the print begins to flex, stop and support it with your other hand before applying more force.
Step 3: Cut Contact Points Instead of Twisting Them
Near detailed surfaces, cut the support close to the contact point while leaving a very small amount of material for later cleanup. This is often safer than trying to remove the support perfectly flush in one pass.
Flush cutters are effective when their jaws can approach the contact point without pressing into the model. A sharp hobby knife can handle small nubs, but it usually requires more attention to blade angle and hand position. A precision ultrasonic cutter can be useful where reducing cutting force and reaching a narrow connection are the main priorities.
No tool eliminates the need for control. Powered blades remain sharp, and the model can still be marked if the blade touches a finished surface.
Step 4: Stabilize Fragile Features
Support the model close to the area being cut. Holding the base while cutting near the top of a tall, thin feature gives the part room to flex. Instead, place a finger behind or beside the feature without putting your hand in the cutting path.
For hollow or brittle resin prints, avoid squeezing the model too tightly. After washing and curing, resin can behave differently depending on formulation, wall thickness, exposure, and temperature. If you are unsure, test your tool and technique on a spare support or failed print first.
Step 5: Separate Removal From Finishing
Support removal and surface finishing are two different jobs. The first goal is to free the model without damage. The second goal is to refine the remaining marks.
After the main supports are removed:
- Trim remaining nubs gradually.
- Use fine files or sanding sticks appropriate for the material.
- Inspect the surface under side lighting.
- Use filler primer only when the project and finish require it.
- Clean dust before painting or assembly.
Trying to achieve a perfectly smooth surface during the first cutting pass often leads to accidental gouges.
Which Tool Fits Each Stage?
| Tool | Best Use | Main Limitation |
|---|---|---|
| Flush cutters | Accessible branches and larger support connections | Jaws need room and can press against nearby details |
| Hobby knife | Small nubs and surface refinement | Requires careful force, angle, and hand placement |
| Ultrasonic cutter | Dense supports, narrow access, and controlled precision cuts | Still requires material testing and safe blade control |
| Sanding sticks and files | Final marks, edges, and surface preparation | Slow and may soften sharp details |
Where SonicMax Slice 10 Fits
SonicMax Slice 10 is designed for makers who regularly work around small details, tight support structures, foam, leather, plastic, and model-building materials. Its ultrasonic system uses high-frequency blade vibration to reduce cutting resistance rather than relying only on hand pressure.
The campaign highlights a Q > 500 transducer, real-time adaptive output control, a replaceable 5000mAh 21700 battery, built-in active cooling, an OLED status display, Lift-to-Activate sensing, and an LED work light. Runtime is listed as up to four hours, with USB-C use while charging.
These features are intended to support longer and more controlled maker workflows. Actual results still depend on the material, thickness, blade, geometry, and technique. Always test an unfamiliar material before working on a finished part.
Common Support-Removal Mistakes
Pulling the entire support tree at once
This may be fast on a forgiving print, but it can send force into multiple contact points at the same time. Section the structure first.
Cutting perfectly flush on the first pass
Leaving a small nub is often safer. Return after the model is free and visible from every angle.
Ignoring the cutting direction
Whenever possible, direct the blade and released support away from the model and away from your hand.
Assuming every resin or filament behaves the same
PLA, PETG, ABS, and different resin formulations vary in flexibility, brittleness, and heat response. Tool settings and removal technique should change with the material.
Treating tool choice as a substitute for slicer settings
Better support interfaces, orientation, density, and contact settings can reduce cleanup before printing begins. Post-processing tools should improve a good workflow, not compensate for every slicing problem.
Frequently Asked Questions
Should supports snap off easily?
Well-tuned supports often remove easily, but complex geometry can still create enclosed or high-risk contact points. Easy removal is the goal, not a guarantee for every model.
Can an ultrasonic cutter replace flush cutters?
Not always. Flush cutters remain efficient for accessible branches. An ultrasonic cutter is most useful when access, precision, or reduced cutting force matters.
Can Slice 10 be used on PLA, PETG, or resin supports?
The campaign demonstrates maker and 3D-printing applications, but behavior varies by material and geometry. Begin with a low-risk test area and avoid touching finished details.
Do I still need sanding?
Usually, yes. Cutting removes the support structure; sanding, filing, or other finishing methods refine the remaining contact marks.
Is the $99 Super Early Bird reward still available?
No. The first 200 Super Early Bird rewards have been claimed. As of this August 12 update, the limited Early Bird reward is $119. Current availability should always be confirmed on Kickstarter.
When is delivery estimated?
The current rewards list estimated delivery in October 2026. Kickstarter projects involve production and fulfillment risks, so backers should review the campaign timeline and risk section before pledging.
A Better Cleanup Workflow Starts Before the Print Finishes
Clean support removal combines good orientation, thoughtful support settings, careful sectioning, the right tool for each contact point, and patient finishing. The most useful tool is not necessarily the one that removes supports fastest. It is the one that gives you enough control to protect the work already invested in the print.
For more background, read How Do You Remove 3D Print Supports Cleanly? and Ultrasonic Cutter vs Hobby Knife for 3D Print Cleanup.
SonicMax Slice 10 Is Now on Kickstarter
Explore the working prototype, technical design, reward options, delivery estimate, and campaign risks before choosing the reward that fits your workflow.
Share:
SonicMax Slice 10 Is Live on Kickstarter